To build an agreement from a template you can start by clicking the New Agreement button or by opening the Templates section.
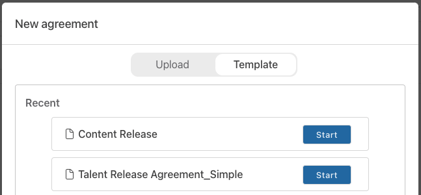
New Agreement button
Recently used templates will be accessible by clicking the New Agreement button and toggling to Template. Just click Start on any listed template to begin!
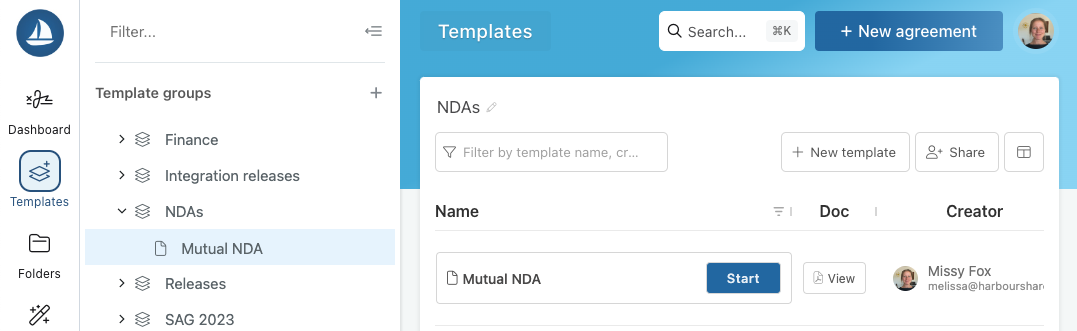
Templates section
Your full template gallery can be accessed by clicking Templates in the left navigation. Here you can browser your template groups and click on any template in the side panel, or Start button in the main grid to begin.
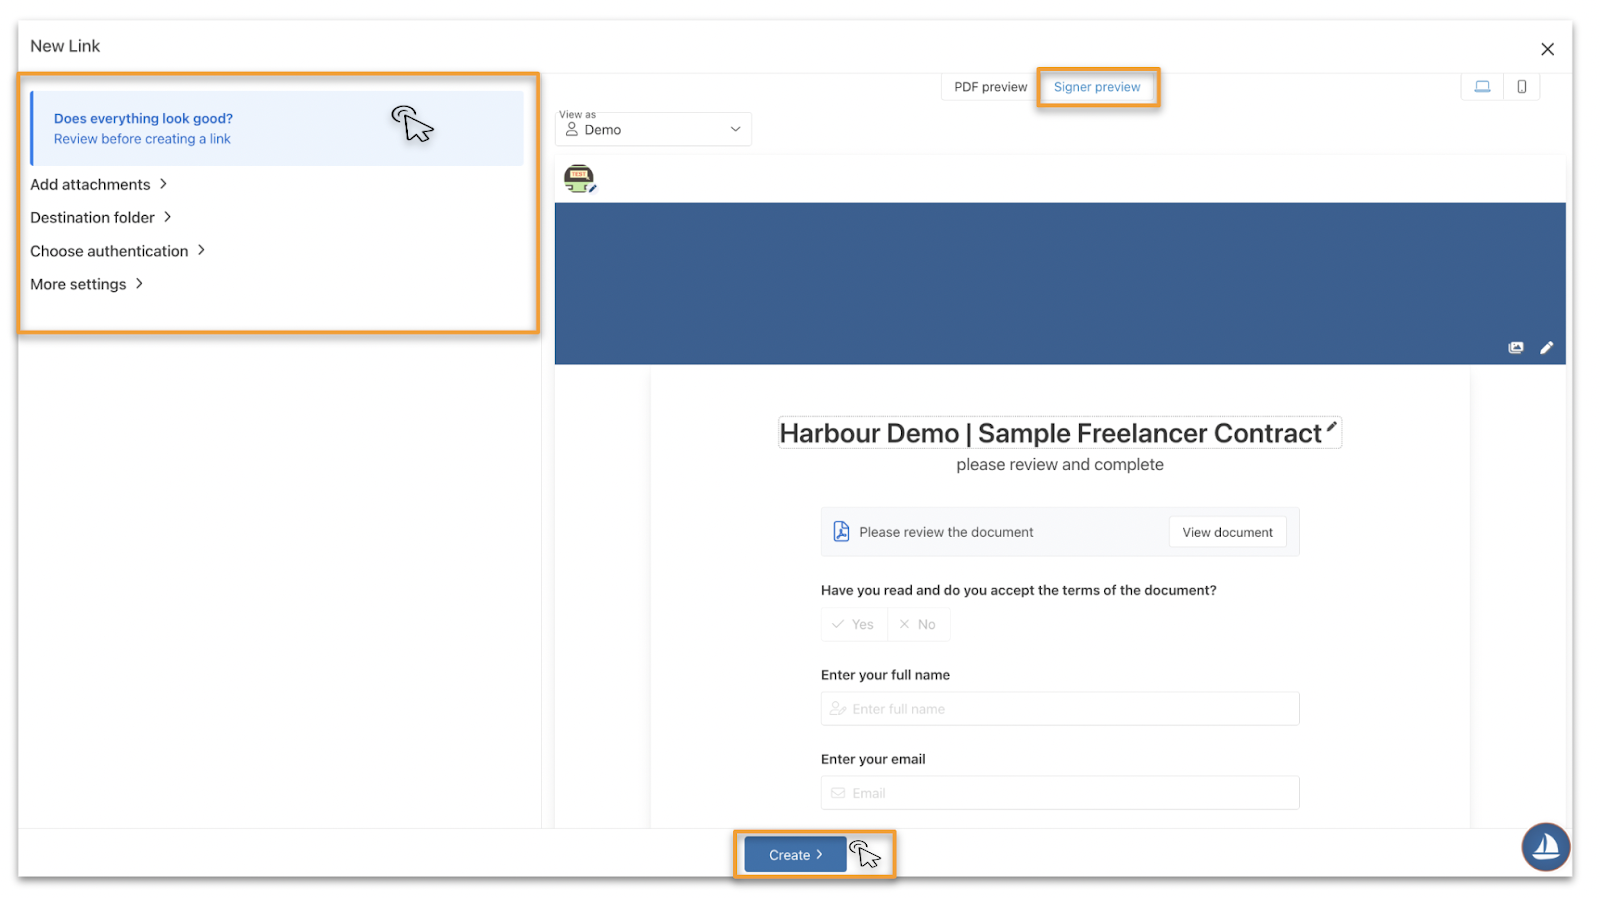
Once you choose your template (via either path above) the link builder will load. Within the builder you'll see fields and settings on the left and a preview on the right.
- On the left side pane you can:
- Fill your Fields
- This may or may not be present depending on how the template was set up. If there are fields to complete they'll be listed and you can enter the requested information.
- Add attachments
- Optionally, you can attach content to any link via this section. For example, this is helpful when referencing a specific clip or image as related to an appearance or copyright agreement.
- Select A Destination Folder
- This is an important step. It is how you define where you want the final signed agreement to be stored in Harbour.
- Fill your Fields
-
- Choose authentication
- This is where you can provide the signer names/emails if the template is set up to require them. If you expand this section and see Public link, there is no action to be taken.
- Choose authentication
-
- More Settings
- This is where you can select email notification options, customize the URL, and define an internal dashboard link name. All settings here are optional.
- More Settings
- On the right side pane, you can:
- View the Signer Preview (default view). This shows exactly what the signer will see when you send them the link.
- View the PDF Preview. This shows the document itself. It can be accessed by clicking PDF preview at the top, or View Document within the signer preview.
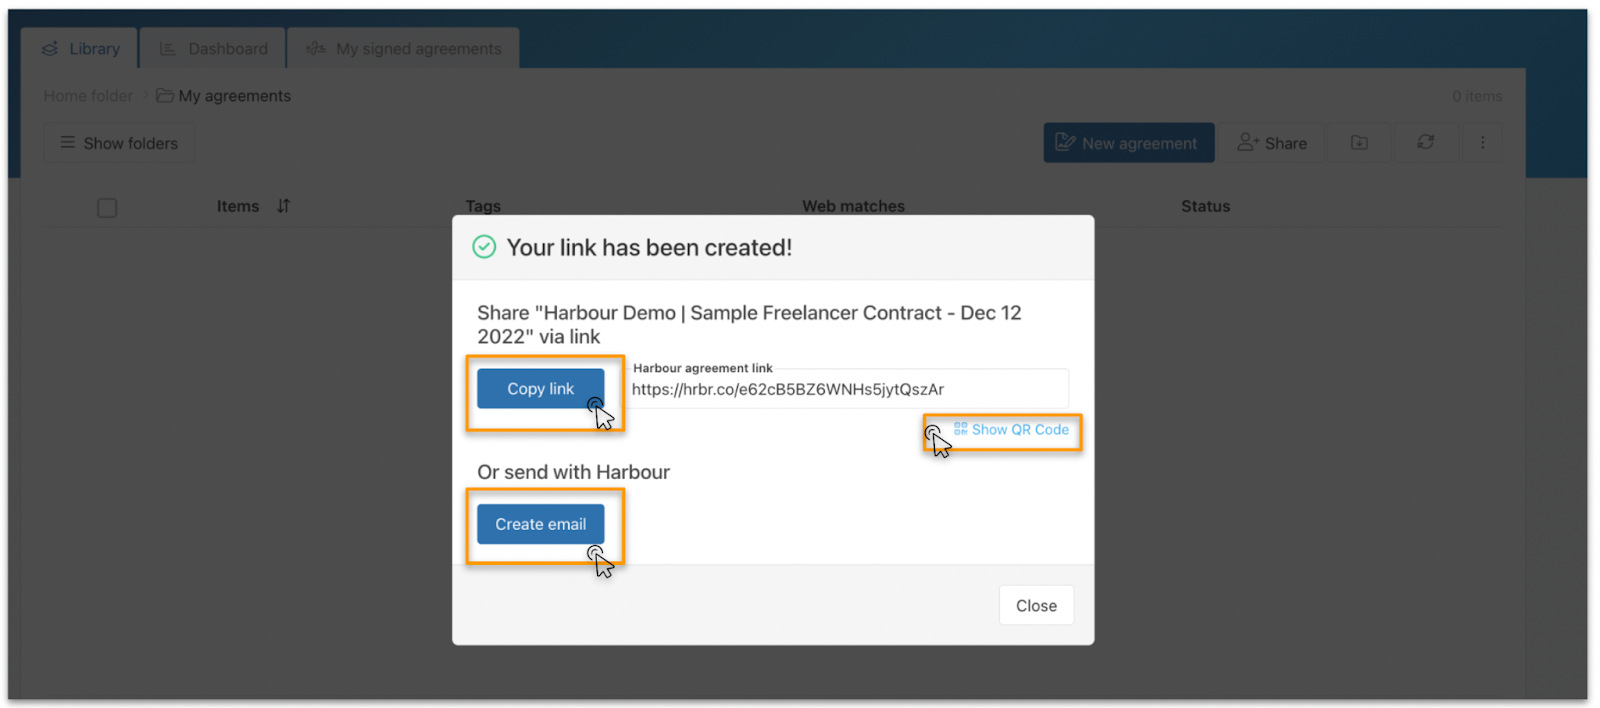
When you have completed all required items on the left, click Create on the bottom of the screen.
- Copy link - you can copy and paste the URL to send it to the signer(s).
- Create Email - you can create an email that will directly send the link to the signer(s) through Harbour.
- Show QR code - This will display the QR code for the URL. You can personalize and download here as well. For more info on QR codes, click here.